As air fryers continue to dominate modern kitchens with their promise of healthier, oil-free cooking, maintenance has become a growing concern among users. While these countertop gadgets are loved for their convenience, many users are unaware of the proper cleaning methods required to keep them functioning optimally.
Experts have now advised that regular cleaning of an air fryer is essential, not only to improve taste and performance but also to prevent safety hazards such as grease fires and unpleasant odors.
Why Cleaning Your Air Fryer Matters
Industry specialists warn that failing to clean your air fryer regularly can lead to burnt food residue, reduced air circulation, and potential overheating of components. Additionally, leftover grease and food particles can cause smoke during use, affecting both taste and air quality in the kitchen.
“A clean air fryer ensures even cooking, better-tasting meals, and a longer appliance lifespan,” a kitchen appliance technician told News Access NG.
Tools You Need for the Job
According to home maintenance guides, cleaning an air fryer requires just a few household items. These include:
- Mild dish soap or degreasing detergent
- A non-abrasive sponge or microfiber cloth
- A soft toothbrush or brush for tight corners
- Baking soda for stubborn stains
- Warm water and paper towels
- Optional: Lemon juice or white vinegar for deodorizing

Read Also: How to watch BBNaija season 9 on DSTV, GOTV, other platforms
Step-by-Step Guide to Cleaning
Step 1: Unplug and Let It Cool
Safety comes first. Always unplug the air fryer and allow it to cool completely before cleaning.
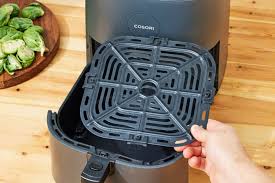
Step 2: Remove and Wash Components
Detach the basket, pan, and tray. Wash them in warm, soapy water or place them in the dishwasher if the manual allows. Soak greasy parts for up to 15 minutes before scrubbing with a sponge.
Step 3: Wipe Interior Walls
Use a damp cloth or sponge to clean the inner chamber. A toothbrush may be used to reach corners. Avoid water contact with the heating element.
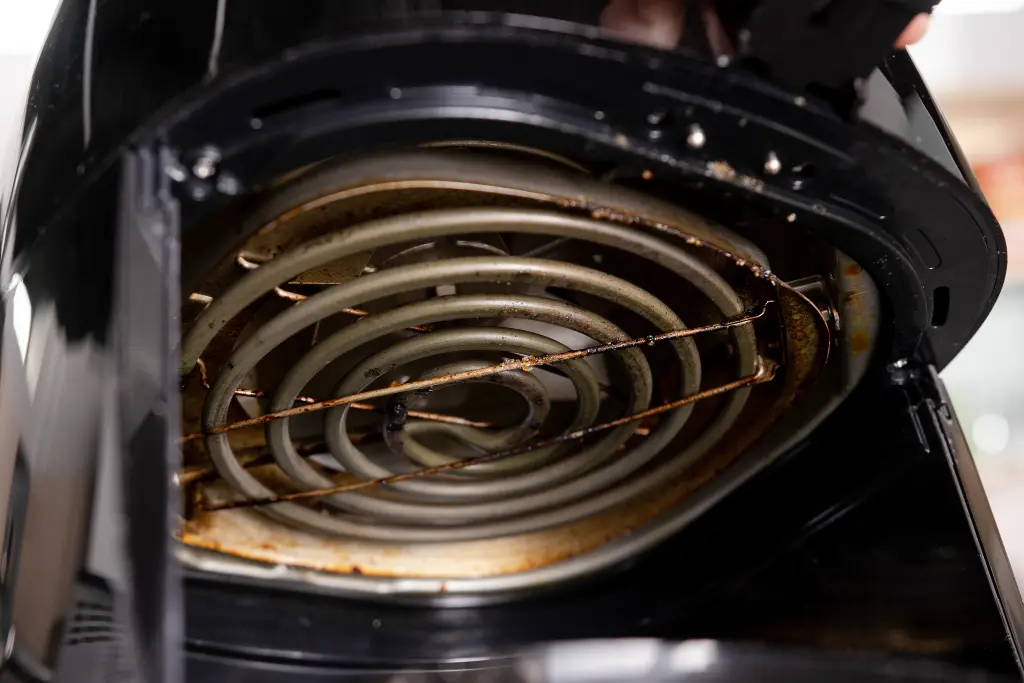
Step 4: Clean the Heating Element
Tilt the air fryer or turn it upside down (if safe) to clean the heating element gently using a brush or lightly damp cloth. Do not use water directly.
Step 5: Clean Exterior Surfaces
Wipe the outer body of the appliance with a damp cloth and dry immediately.
Step 6: Deodorize When Necessary
To remove strong food odors, experts suggest applying a paste of baking soda and water to the basket or running a cycle with lemon juice and water at 350°F for three minutes.
Common Mistakes to Avoid
Users are strongly advised not to submerge the main unit in water, use abrasive scrubbers, or apply harsh chemicals such as bleach. “These actions can damage the non-stick coating or the electrical components,” a safety specialist noted.
Cleaning Frequency Matters
Experts recommend cleaning the basket and tray after every use, performing a weekly wipe-down of the interior and heating element, and deep-cleaning the entire appliance at least once a month.
Tips to Minimize Buildup
- Apply a light spray of oil to prevent food from sticking
- Use parchment liners if your air fryer model allows
- Avoid overloading the basket
- Store in a dry, clean location
Final Thoughts
Air fryers may be easy to use, but proper maintenance is key to maximizing their benefits. With just a few minutes of cleaning after each use and routine deep-cleaning, users can extend the life of their appliance and keep meals tasting fresh.